
Your kitchen feels warm, the bin stays empty, and long cycles deliver little to show for it. That pattern usually means heat is not leaving the system fast enough or the sealed loop cannot hold its charge. Give the machine a fair environment, clear, obvious choke points, then watch a few full cycles closely. Once you separate user-fixable conditions from sealed-system symptoms, you will know if a quick reset restores solid cubes or if a qualified technician should check for a leak in your ice maker.
What Is Refrigerant and Why It Matters in Ice Makers
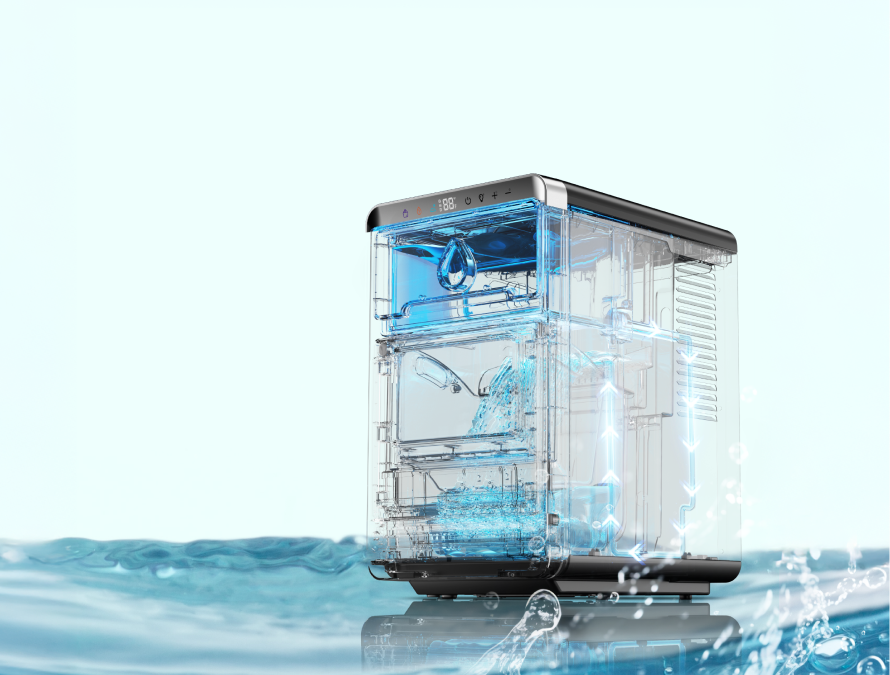
Refrigerant shuttles heat from the evaporator to the condenser by changing state from liquid to vapor and back again. Many compact appliances use a hydrocarbon like isobutane for efficiency, handled with strict safety practices. The circuit is a closed loop, so the charge does not “run out” during normal use. If the charge is low, something allows refrigerants to escape. Proper repair follows a sequence: confirm leakage, fix the leak, evacuate to remove air and moisture, then charge by weight to the nameplate amount. Skipping steps invites repeat failure and potential compressor damage.
Sign 1: The Compressor Is Running, But Nothing Is Getting Cold
A steady hum with no chill points to poor heat rejection or a sealed-system fault. Begin with airflow. A condenser packed with dust raises pressures and temperatures. Intake or exhaust grilles pressed against walls trap warm air near the cabinet. Improve the environment before you blame a low charge. Pull the unit forward, vacuum the grilles, and make sure the room is not overheated. If the cabinet still refuses to drop in temperature across a full cycle after those fixes, the ice maker not making ice has likely moved from a placement issue to a sealed-system problem that needs professional diagnosis.

Sign 2: Your Portable Unit Makes Small, Wet, or “Slushy” Ice
When cubes look thin, soft, or half-melted, the evaporator is not pulling heat fast enough. Rule out operating conditions first. If slush returns across several cycles under good conditions, a sealed-system issue on a portable ice maker becomes likely.
Water and Room Temperature
Use cool feed water and place the unit in a moderate room. Let the tap run until the water feels distinctly cool, or chill a pitcher briefly before refilling. Hot kitchens raise the condenser temperature and slow each freeze cycle. Test in a cooler room if possible. If ice quality improves there, heat load was the bottleneck. In hard-water areas, filtered water helps limit scale and keeps cubes consistent.
Ventilation and Clearance
Leave 4–6 inches of open space on all sides so intake and exhaust can move air. Feel behind the cabinet during a cycle. If the air is hot and stagnant, pull the unit forward or relocate to an open counter. Keep louvers visible rather than pressed against a wall. Avoid shelves or cubbies that trap warm air above the cabinet. Better airflow lowers condenser temperature and shortens the time to drop.
Scale on the Evaporator
Scale insulates cold metal and causes small, wet cubes. First check your manual to confirm what the evaporator is made of. If you have a stainless steel evaporator, you can run the cleaning program with a food-safe descaler or a 1:1 white vinegar and warm water mix for 10–15 minutes.
For copper or nickel-plated evaporators, stick to a manufacturer-recommended descaler or a mild food-safe cleaner labeled safe for copper/nickel, and avoid stronger vinegar or acid blends that can attack the coating.
In all cases, power off, drain, and rinse thoroughly. If safe and accessible per your manual, wipe visible surfaces with a soft cloth; do not use abrasives or metal brushes. Refill with fresh water, run two ice cycles, and discard the first two batches. Set a routine cleaning cadence—monthly in soft water, and more often if buildup returns quickly.
Cycle Observation
Watch a full cycle after improving water temperature, airflow, and cleanliness. If ice remains small or wet across several cycles, schedule a sealed-system diagnostic for the recurring why is my portable ice maker not making ice problem.
Sign 3: Your Countertop Unit Runs Constantly and Doesn’t Drop Ice
A machine that runs for long periods without a clean drop is failing to reach the freeze termination temperature. Restore normal heat rejection first. If behavior does not change, treat it as a sealed-system red flag. Repeated resets add heat and mechanical stress.
Airflow and Condenser Hygiene
Vacuum grille areas. Gently brush the condenser if accessible. Verify the fan spins freely with the power off. Keep dust-heavy items and fabrics away from the intake so fibers do not clog it again. Better heat rejection restores cube hardness and reduces continuous running.
Room Conditions and Leveling
Keep the room within 50–90°F and set the unit level on a firm surface. Use a small bubble level or a leveling app. After transport or tilting, let the unit sit upright before powering on. Many small machines benefit from 1–24 hours of rest. On restart, listen for a smooth compressor tone without rattling.
Time-to-Drop Check
Under good conditions, a household unit should produce a basket within a predictable window for that model. If it runs an hour or longer without a drop, power it down to prevent extra heat, and call a technician for ice maker stopped making ice symptoms that persist on a countertop ice maker.

DIY Troubleshooting for “Ice Maker Not Working”
Handle the safe items first. Many users restore normal size and timing by stabilizing conditions and removing simple bottlenecks. Aim for an indoor environment of 50–90°F, allow 4–6 inches of open space on all sides, and keep the cabinet level. If the machine was tilted or transported, let it sit upright before powering on.
Placement and Clearance
Make sure intake and exhaust openings are not pressed against walls or cabinets. Pull the unit forward so air can pass behind and above it. If the counter traps warm air, move the machine to a cooler spot for testing. Added airflow often drops the condenser temperature and lets the cycle finish.
Room and Water Temperature
Position the unit away from ovens and sun-heated windows. Refill with cool water from the tap or a filtered jug. Warmer inlet water shrinks cubes and lengthens cycles even when the sealed system is healthy.
Level and Upright Time After Moves
Transport stirs compressor oil and refrigerant. Place the unit on a firm, level surface. Wait upright before the next power-on. For many small machines, 1–24 hours is typical. If vibration is obvious on restart, power off and wait longer.
Mineral Scale and Residue
Run the cleaning program with a food-safe descaler or a 1:1 vinegar solution for 10–15 minutes. Drain, rinse, refill with fresh water, and discard the first two batches.
Air Paths and Condenser Dust
Vacuum grille areas and lightly brush the condenser if accessible. Check that the fan spins freely when the unit is off. Improved heat rejection shortens cycles and hardens cubes.
Simple Checks
Seat the drain plug firmly. Look for debris at the pump intake. Confirm the basket moves without interference and that sensors are free of residue. Watch a full cycle to verify the unit actually refills.
Outcome: If these steps restore normal size and timing, the issue came from operating conditions. If performance collapses again under good conditions, plan for a sealed-system diagnostic visit for ice maker not working complaints that keep returning.
At-a-Glance Triage
- Fix at home: airflow improved, room within 50–90°F, cool water used, scale removed, and the machine now drops solid ice within normal time.
- Call a technician: the compressor runs, yet nothing gets cold under good conditions; output stays thin or slushy across several cleaned cycles; the unit runs for long periods without a drop; or the problem returns repeatedly after brief recoveries.

Why You Must Call a Professional for Refrigerant Issues
Refrigerant work in the United States is regulated. A Section 608 certified technician uses approved methods to recover refrigerant, evacuate the system, repair leaks, and charge by weight to the nameplate amount. DIY attempts often admit air and moisture, which corrode internals and reduce cooling capacity. Hydrocarbon refrigerants also add fire risk if handled without training. If a sealed-system fault seems likely, avoid long runs that add heat and stress. Power the unit down, note the symptoms you observed, and schedule service.
Preventing Future Refrigerant Leaks in Your Ice Maker
Lower thermal stress and vibration to help the sealed loop last. Keep the cabinet ventilated and clean so the condenser can shed heat. Place the unit where hot air does not pool and where dust will not clog louvers. Descale on a routine schedule to shorten freeze times and reduce run time. Transport upright, avoid knocks, and allow a rest period after moving. A gentle environment and regular cleaning yield steadier production and quieter operation for an ice maker machine countertop that runs daily.
Conclusion: When to Call a Professional for Refrigerant Issues
If airflow is clear, the room sits within a comfortable indoor range, water is cool, surfaces are clean, the cabinet is level, and simple items like drains and sensors are in order, yet the ice maker is not making ice, problems continue, bring in a professional. Sealed systems operate as closed loops. Durable results come from finding the leak or restriction, evacuating correctly, and charging by weight. Avoid repeated resets or hours of continuous running once a sealed-system fault is suspected, since extended operation can overheat the compressor.
Frequently Asked Questions About Ice Maker Refrigerant Problems
Q1: How do I tell the difference between a water-side issue and a sealed-system fault?
Water-side trouble often shows up as slow fills, visible debris, or improvement after cleaning and cooler feed water. Sealed-system trouble persists in a cool, well-ventilated room with clean surfaces and a level cabinet. If the compressor runs without meaningful chill after you stabilize conditions, arrange a diagnostic visit.
Q2: I moved the unit, and now the ice looks hollow or soft. What helps faster?
Set the machine level and upright. Wait before you power on. Run a cleaning cycle, drain, rinse, then refill it with cool water. Give the cabinet open space so the condenser can move heat into the room. Many models recover once oil and refrigerants resettle and the evaporator is free of scale.
Q3: Is DIY refrigerant work allowed on household appliances?
Handling refrigerant involves recovery, evacuation, leak repair, and precise charging. Those tasks belong to a Section 608 certified technician using approved equipment. Professional service protects safety, capacity, and the compressor’s lifespan.
Q4: Why do hot kitchens wreck production even when the compressor runs?
The condenser must reject heat to the surrounding air. High ambient temperature and blocked airflow raise pressures and reduce the evaporator’s ability to pull heat from water. The machine works longer, yet still falls short of the temperature where ice releases cleanly.
Q5: What routine care keeps performance steady through summer?
Keep the cabinet clean, the grilles dust-free, and the room within a moderate indoor range. Refill with cool water. Descale on a schedule, especially in hard-water regions. Plan the placement with open space on all sides and away from direct sun to help a portable ice maker hold its output.

Leave a comment
All comments are moderated before being published.
This site is protected by hCaptcha and the hCaptcha Privacy Policy and Terms of Service apply.